|
HKL-2000 Online Manual |
||
|
Previous Data, Datasets, and Results |
Table of Contents | |
Create, Save, and Load Projects
Create and edit projects and crystals
HKL-2000 provides a convenient way to keep track of the proteins, data sets, and results of your projects. Although some of the features in the Project tab are more useful in database linked versions of HKL-2000 and in all versions of HKL-3000, which requires a database module license and/or an HKL-3000 license, the basic functionality of the Project tab can make working with your data easier.
When you first open the Project tab, most of the tab will be empty. The Project box will contain the default project name (project 1), the default crystal name (crystal 1), your user name, and the date (Figure 32). To create a new project, click either the new project or the edit project button. This will allow you to fill in information about the name of the project, a description of the project, what type of molecule you are working with (protein, small molecule, or virus), the proteins sequence, and the source of any anomalous signal (if present). If you are using a data collection capable version of HKL-2000, your collected images will be stored in a directory named for this project.
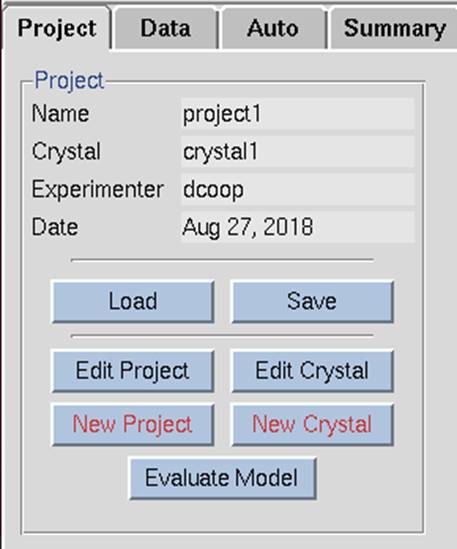
Figure 32. Starting a project
The protein's sequence can be imported from several databases. Select the database using the drop-down menu labeled Obtain Sequence from and type the id associated with that database in the id field (Figure 33). Click download to fetch the sequence.
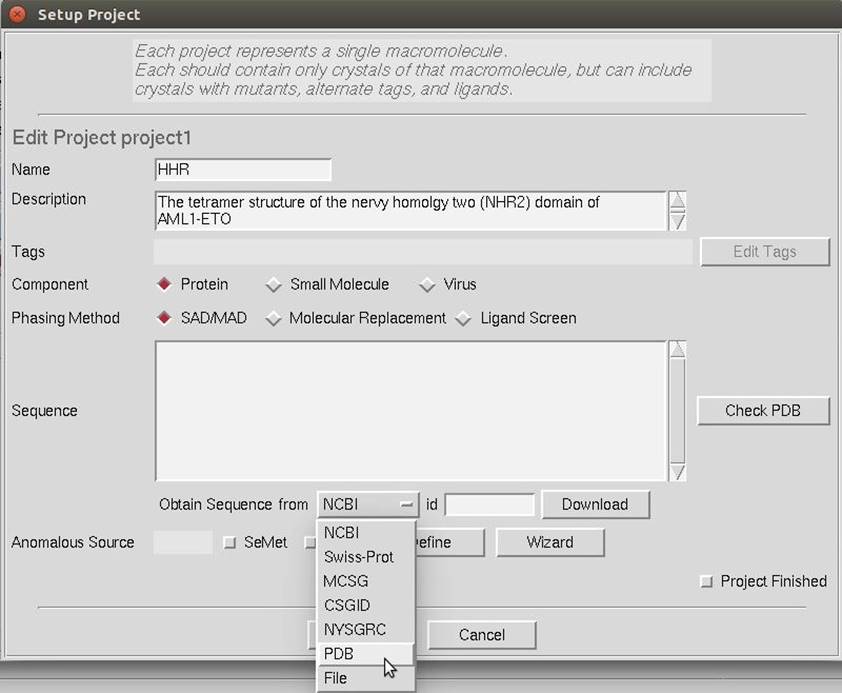
Figure 33. Obtain a sequence from a database.
The Project window also has to be used to specify the source of an expected anomalous signal. There is an Anomalous Wizard button in both the Edit/Create Project dialog and the main Project tab. If you select SeMet or Sulfur, the number of those residues present in the sequence will be filled in. The Define button will display a periodic table that will let you select any element, but then you should enter the number of expected "heavy" atoms. The Wizard button will display a periodic table with the atomic absorption edges of elements that are accessible at synchrotrons (Figure 34). Selecting an element will display its X-ray anomalous scattering plot (Figure 35). Move the mouse in the window to display the anomalous scattering coefficients (f' and f'') for the energy (and wavelength) at the position of the crosshair (Figure 35). This can help you determine the wavelength to collect your data or the expected anomalous signal for the data you have already collected.
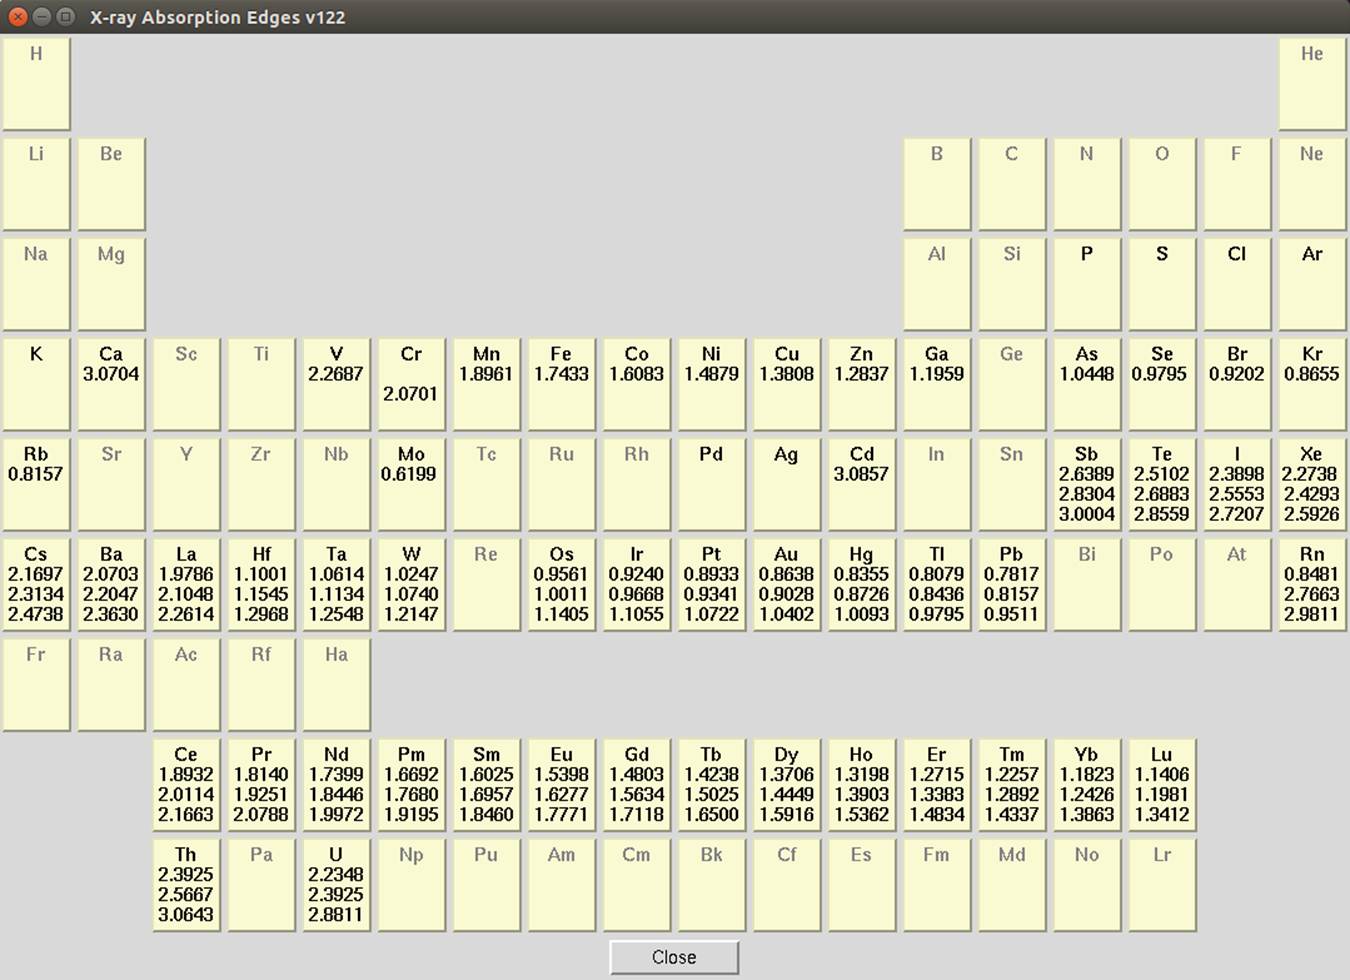
Figure 34.
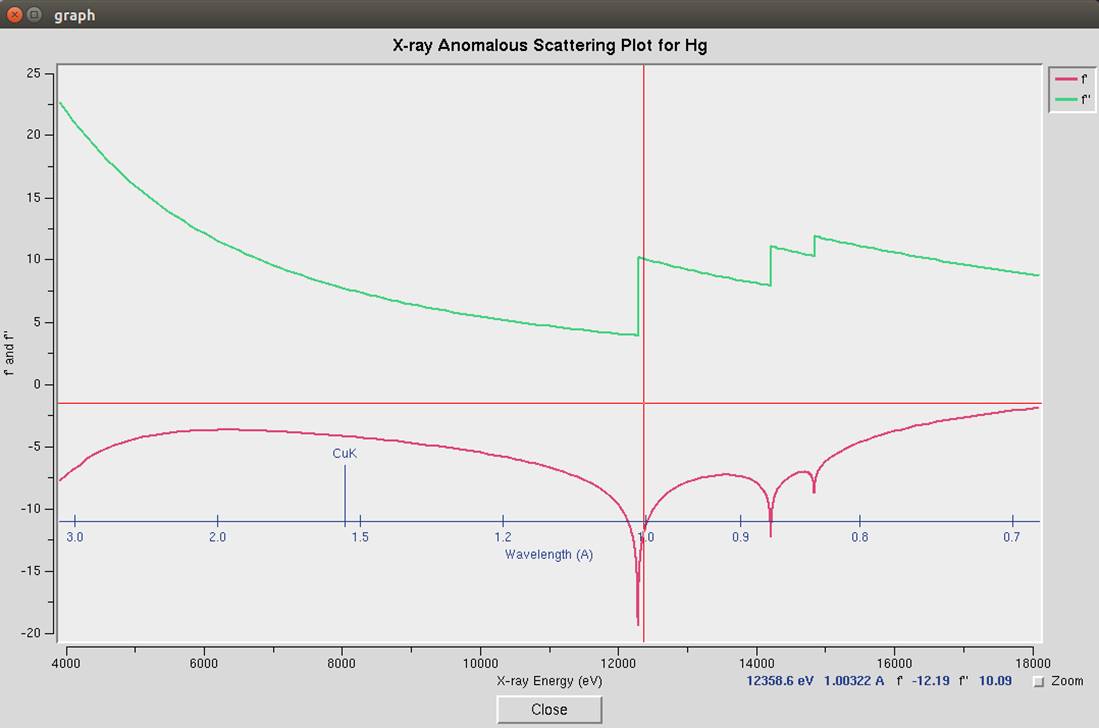
Figure 35. The anomalous scattering plot for mercury
When you have finished entering the project information, click done. If you entered this dialog using the create project button, you will be taken directly to the Edit Crystal dialog (Figure 36). If you entered this dialog using the edit project button, you will return to the Project tab, which will now display the information about your project (Figure 37).
The edit crystal dialog allows you to enter information about the crystal, including the crystal name, size, and description (Figure 36). If you are using a data collection capable version of HKL-2000, your collected images will be named based on the crystal name.
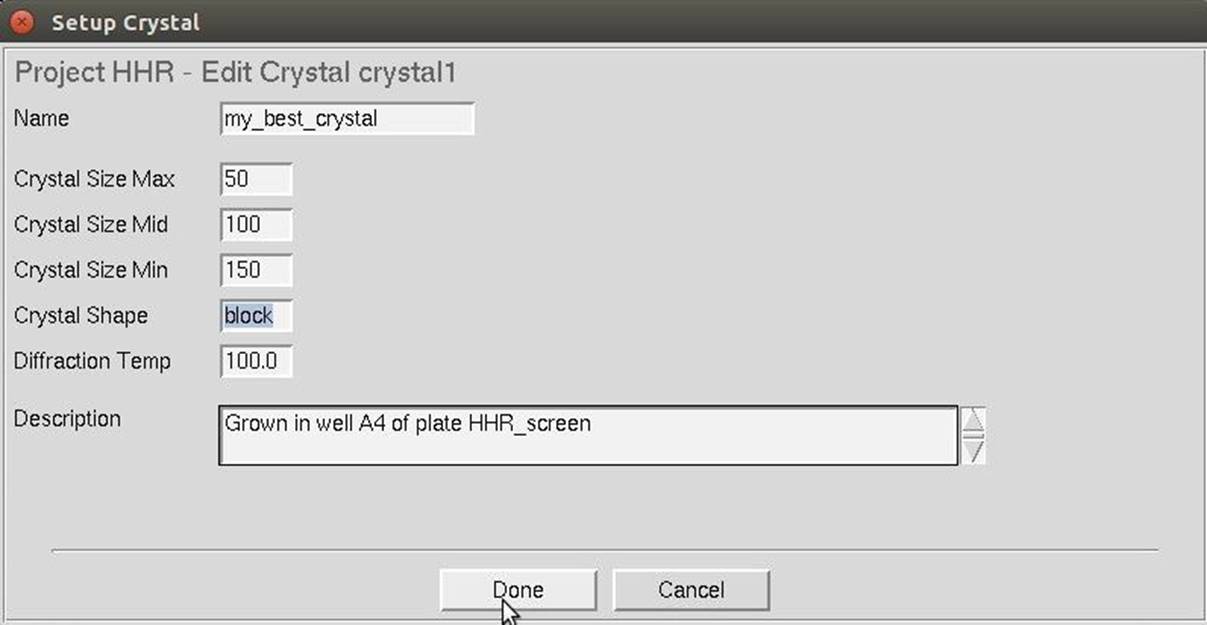
Figure 36. The Create/Edit crystal dialog
When you have finished editing the project, you will return to the Project tab. The sequence will be displayed, and you will see a tabulation of the number of each residue in your sequence. In database connected versions of HKL-3000, information from the database will appear in the Protein Data box.
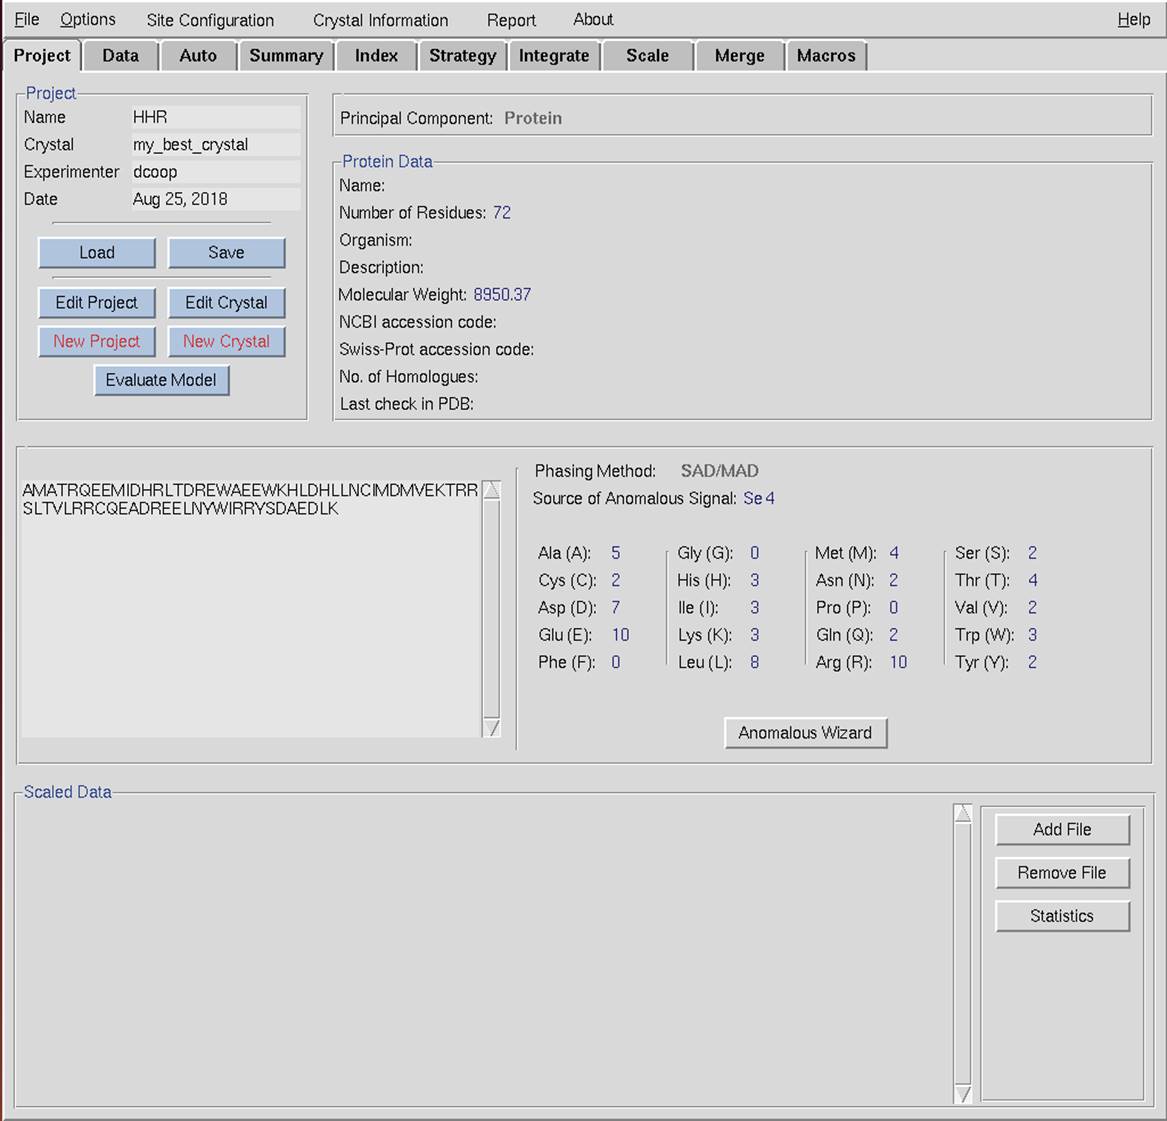
Figure 37. The Project tab after creating a project.
Saving and Loading Projects
The primary advantage of creating projects in HKL-2000 is that you can save your project, which can simplify the process of re-starting or continuing where you left off. To save your project, select the Save button in the Project box. You will be presented with a dialog to specify where to save your project (Figure 38). The file name will automatically be given a ".sav" extension.
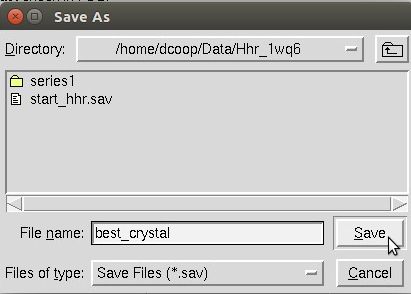
Figure 38. The Save Project dialog
Loading a project is also straight forward. Use the Load button to display the file selection dialog (Figure 39). After loading a project, not only will it load the information about the project, but will also populate the data tab with the data sets you have. If you have already scaled some data, you will see information about the scaling ( Figure 106 ).
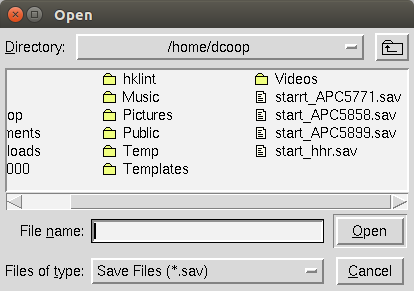
Figure 39. The Load Project dialog
|
HKL-2000 Online Manual |
||
|
Previous Data, Datasets, and Results |
Table of Contents | |